

Creating Neo Ninja
What started as Body Mechanics practice for tumbling on slopes, quickly turned into a fast-paced combat scene about closing distance
Beginning the Block
The first iteration of the Blockout started
with a few keys and a slope. I knew I wanted some bullets flying in there but didn't know much else.


Around the Block
After swapping enemy characters to the AgentW MRig, I finalized the blockout knowing this project would end in Unreal Engine 5.
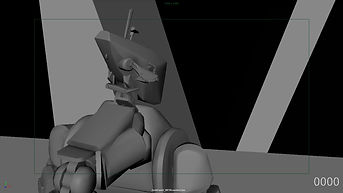
Starting to Spline
With the Blockout finished, I started piecing together the spline animation one step at a time. This is the lengthiest part of the entire process.

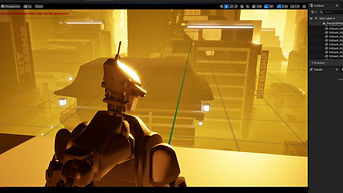
Clean it Up
The Spline pass typically takes a few rounds of polish before it's readable. After some feedback and iteration, I arrived at a good point to move to Unreal Engine.
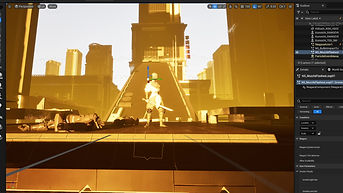
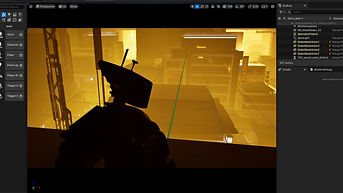
Set Dress and Bug Fix
Imports don't usually go as planned right out the box. Getting the characters in takes a good amount of troubleshooting and patching on it's own. With the characters in though, it's time to dress it up. For this, I used a KitBash Neo Cityscape asset pack.
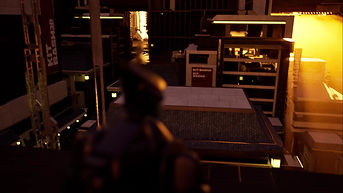
Cloth Sim, Environment, and VFX
With the Environment complete, I move onto simulating the cloth on our protagonist. After some iteration, I get a result I'm happy with. All that's left is to begin the VFX process. VFX takes time, though I'm fortunate to have a lot of help from Anoop Herur-Raman in this stage.
Finalize it
With everything falling into place, it's time to add the final VFX Systems and get them populating the scene. After some tweaks, this'll be ready for a render.
Render it
Not all renders work out. The first few attempts were throwing VFX bugs and errors with rendering Unreal's Time Dilation. Always neat to see what it was looking like when it wasn't there just yet.
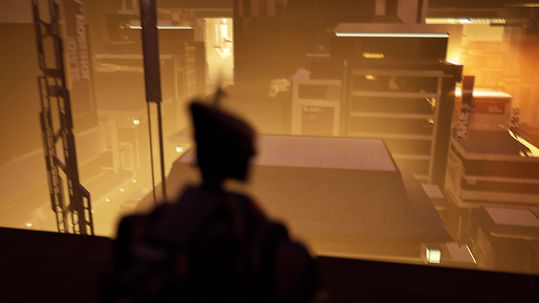
Ship it
With the final render, it's time to put it out into there. Onto the next!